

Running the previous build of Windows 11 or Windows 10 and the new build is not showing up for you?
Checked updates in setting with no new build available?
This might be due to policies set on your device trough Group policies or Intune set by you company admin.
If those are not interfering with your attempt to update, you might be facing a compatibility issue.
To find out what’s going on you can check the ‘redreason’ key in the registry.
Option 1: lookup the key with regedit
with registry editor navigate to
Computer\HKEY_LOCAL_MACHINE\SOFTWARE\Microsoft\Windows NT\CurrentVersion\AppCompatFlags\TargetVersionUpgradeExperienceIndicators
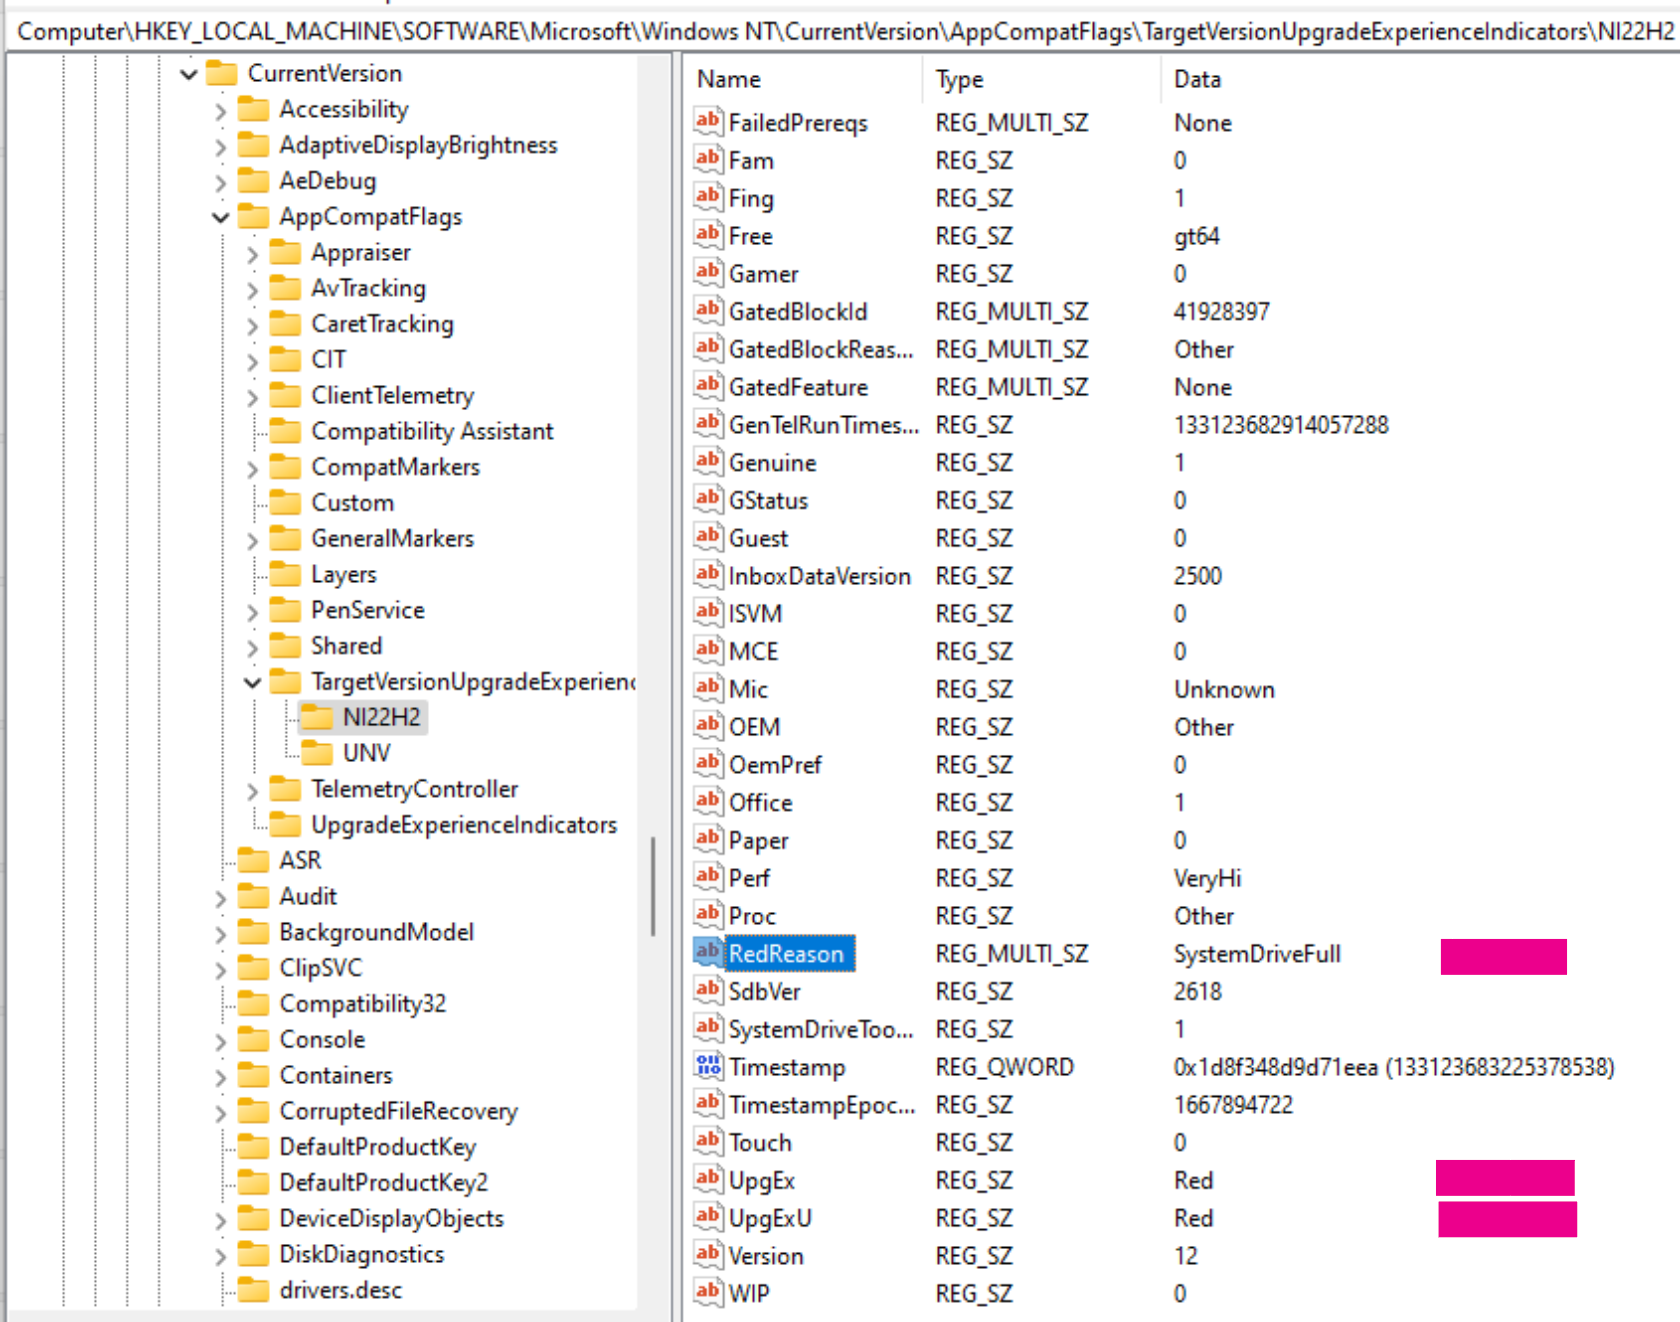
This key will have key referring to the target edition your device has checked for compatibility in this case NI22H2.
with that key selected in the navigation pane, the pane on the right should contain a key called RedReason
Option 2: use a PowerShell script
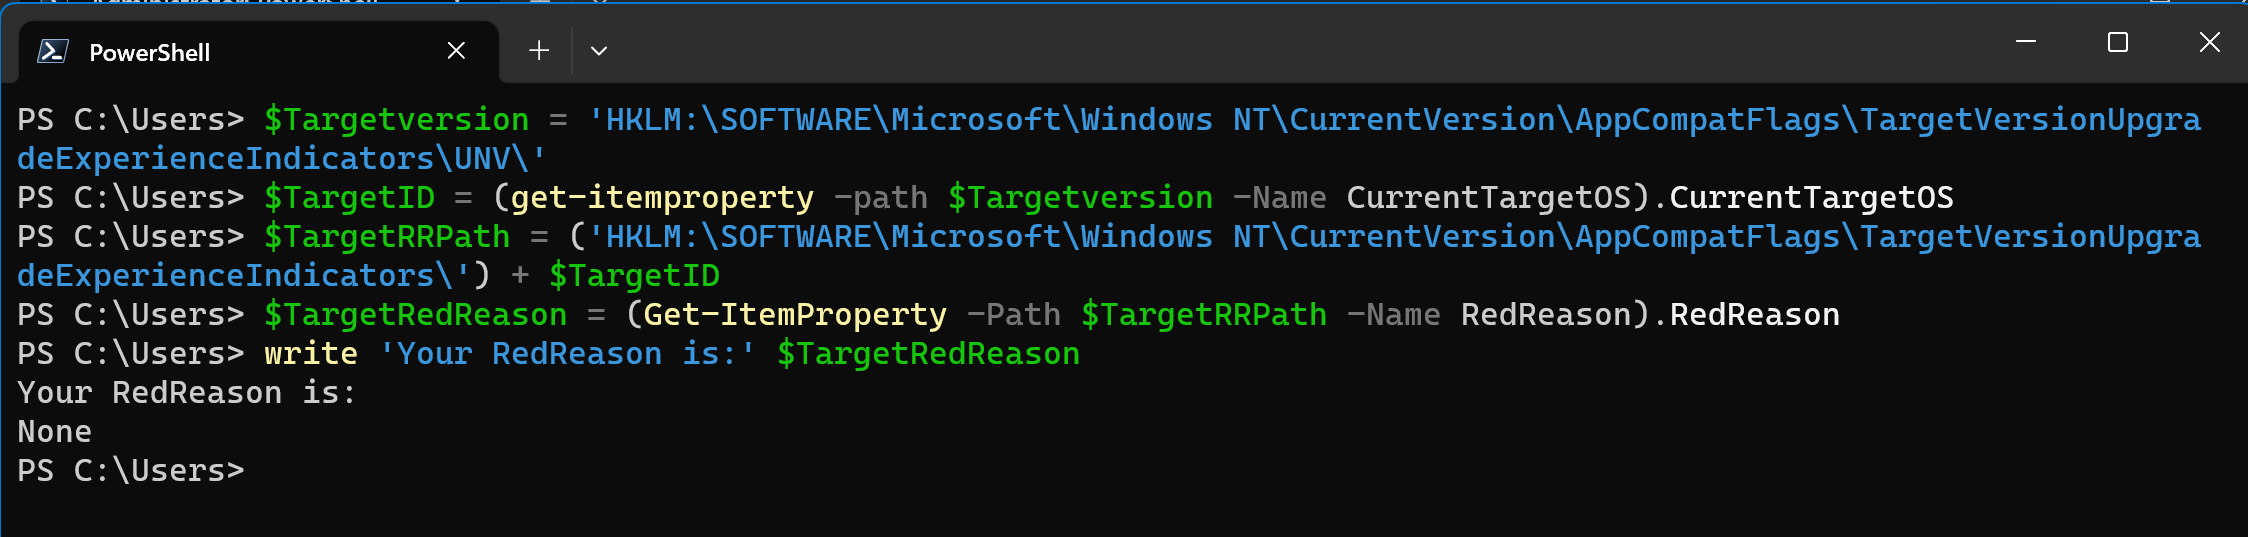
PowerShell script to pull the info without opening regedit:
$Targetversion = 'HKLM:\SOFTWARE\Microsoft\Windows NT\CurrentVersion\AppCompatFlags\TargetVersionUpgradeExperienceIndicators\UNV\'
$TargetID = (get-itemproperty -path $Targetversion -Name CurrentTargetOS).CurrentTargetOS
$TargetRRPath = ('HKLM:\SOFTWARE\Microsoft\Windows NT\CurrentVersion\AppCompatFlags\TargetVersionUpgradeExperienceIndicators\') + $TargetID
$TargetRedReason = (Get-ItemProperty -Path $TargetRRPath -Name RedReason).RedReason
write 'Your RedReason is:' $TargetRedReason
In the example shown above in the regedit screenshot the system partition was too full, blocking the upgrade attempt.
If you are running into this exact issue here’s the fix: Fix – Windows 11 upgrade fails with ‘We couldn’t update system reserved partition’ – TechNine
Speeding up a re-check
If you RedReason is none and you are still not seeing the new build offered, you can re-trigger the compatibility check by Removing everything under the ‘TargetVersionUpgradeExperienceIndicators’ key + reboot the device.
To do this with PowerShell (requires run as admin)
# Define the registry path
$registryPath = 'HKLM:\SOFTWARE\Microsoft\Windows NT\CurrentVersion\AppCompatFlags\TargetVersionUpgradeExperienceIndicators\'

# Get all subkeys
$subKeys = Get-ChildItem -Path $registryPath

# Iterate over each subkey and remove it
foreach ($subKey in $subKeys) {
    Remove-Item -Path "$registryPath\$subKey" -Recurse -Force
}

# Get all values
$values = Get-ItemProperty -Path $registryPath

# Iterate over each value and remove it
foreach ($value in $values.PSObject.Properties.Name) {
    Remove-ItemProperty -Path $registryPath -Name $value
}

Write-Output "All sub-items and keys under $registryPath have been removed, but the root has been preserved."
To manually trigger a re-check for compatibility, after the reboot
- Press Windows logo key + S or select Search, type cmd, and then select Run as administrator under Command Prompt on the right side.
- Then type the following command and press Enter:
schtasks.exe /Run /TN “\Microsoft\Windows\Application Experience\Microsoft Compatibility Appraiser” - Wait a couple of minutes for the task to complete, then reopen Settings > Update & Security > Windows Update.


3 comments
One note on the above – found that it was necessary to not only reboot, but also run the Scheduled Task (or wait a day) named “Microsoft\Windows\Application Experience\Microsoft Compatibility Appraiser” – this reruns the appraisal and after 10-15 minutes, the CO21H2 (or NI22H2) key and parent TargetVersionUpgradeExperienceIndicators key. Tip of the hat to https://www.thewindowsclub.com/manually-run-windows-10-compatibility-appraiser for this hot tip (written for Win10 updates from Win7, but still applies today!)
Author
Thanks Kyle S Great Tip!
Thanks a lot, with a baseline / compliance rule i can now remove the old entry after we had enable the TPM and so we can do the upgrade.
thumbs up. 🙂